The BEST Homemade Coffee Ice Cream EVER!
Did I really just say “the best” coffee ice cream? Yes. Yes, I did!

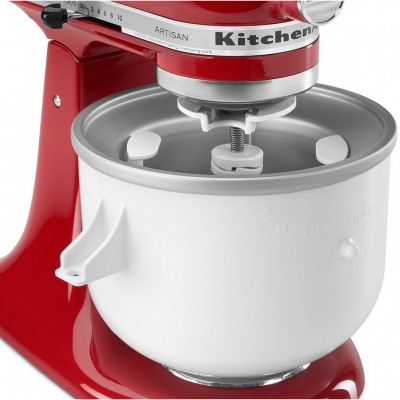
If you’ve been following my Instagram account at all, you are well aware of my newfound passion for homemade ice creams. I got a new ice cream maker (or rather, the attachment for my beloved stand mixer!) for my last birthday and I have been having WAY too much fun experimenting.
So far I have tried Lemon Buttermilk, Cherry Garcia, Coffee, Mint Chip, Vanilla Bean, Biscoff Cookie Butter, and more. You guys, I am not exaggerating when I say that this ice cream maker is my new favorite thing in the kitchen!
I haven’t been doing much recipe sharing of my ice creams yet, because I have just been too busy eating them. But this one was just too perfect not to share! This is my final tweak (and now permanent recipe!) for homemade coffee ice cream. Creamy, smooth, strong but not too strong, this is everything I have been looking for. I am a happy girl!
If you don’t have a KitchenAid Ice Cream Maker Attachment, I HIGHLY recommend getting one. It’s the best kitchen purchase I have made in years!
*This post has a few affiliate links! Thank you for your support of my ice cream making addiction! Ha!
I had a friend rave about hers for a while before I finally took the plunge and I only wish I had gotten one sooner! So fun, and as long as you store the bowl in the freezer (we keep ours out in the garage deep freezer so it’s out of the way!) you can have homemade ice-cream in just minutes!
Enjoy!!
Ingredients
- 2 large fresh, organic eggs*
- 3/4 cup sugar
- 1/4 teaspoon salt
- 2 cups heavy cream
- 1 cup lowfat milk
- 2 (0.11oz each) Starbucks VIA instant coffee packets
- 1/2 cup frozen chopped fudge, optional
Instructions
- Beat the eggs with a wire whisk in your regular mixer bowl until light and fluffy, about 2 minutes. Slowly pour in the sugar & salt, while continuing to whisk, and keep beating until very creamy and thick, another 2 minutes or so.
- Whisk in the cream, milk and VIA packets until all the coffee granules have dissolved. Pour this mixture into the chilled bowl of your ice cream maker and process according to manufacturer instructions (lowest speed on the KitchenAid mixer!).
- When the ice cream is quite thick, looking like soft-serve ice cream, add in the chopped fudge if you are using it. (I make a batch of fudge and store it in the freezer using a bit as I need it for ice creams. You can buy some, make some, or leave it out. Up to you!)
- Transfer the soft ice cream to a freezer-safe container. You can enjoy it right away as soft-serve, but it really does taste better, in my opinion, after several hours or even a few days in the freezer. Again, do what works for you, you won't be disappointed!
- *There are raw eggs in this recipe. That should not be a problem at all, unless you have a weakened immune system. Just make sure you are using fresh, good quality eggs!
**A few little ice-cream-making tips: Keep all ingredients very cold at all times. And keep your freezer bowl in the freezer until the very, very last second!

